Start with the final product, the tweet:
#stlwx #timelapse - Automated sky capture from my backyard in St. Louis
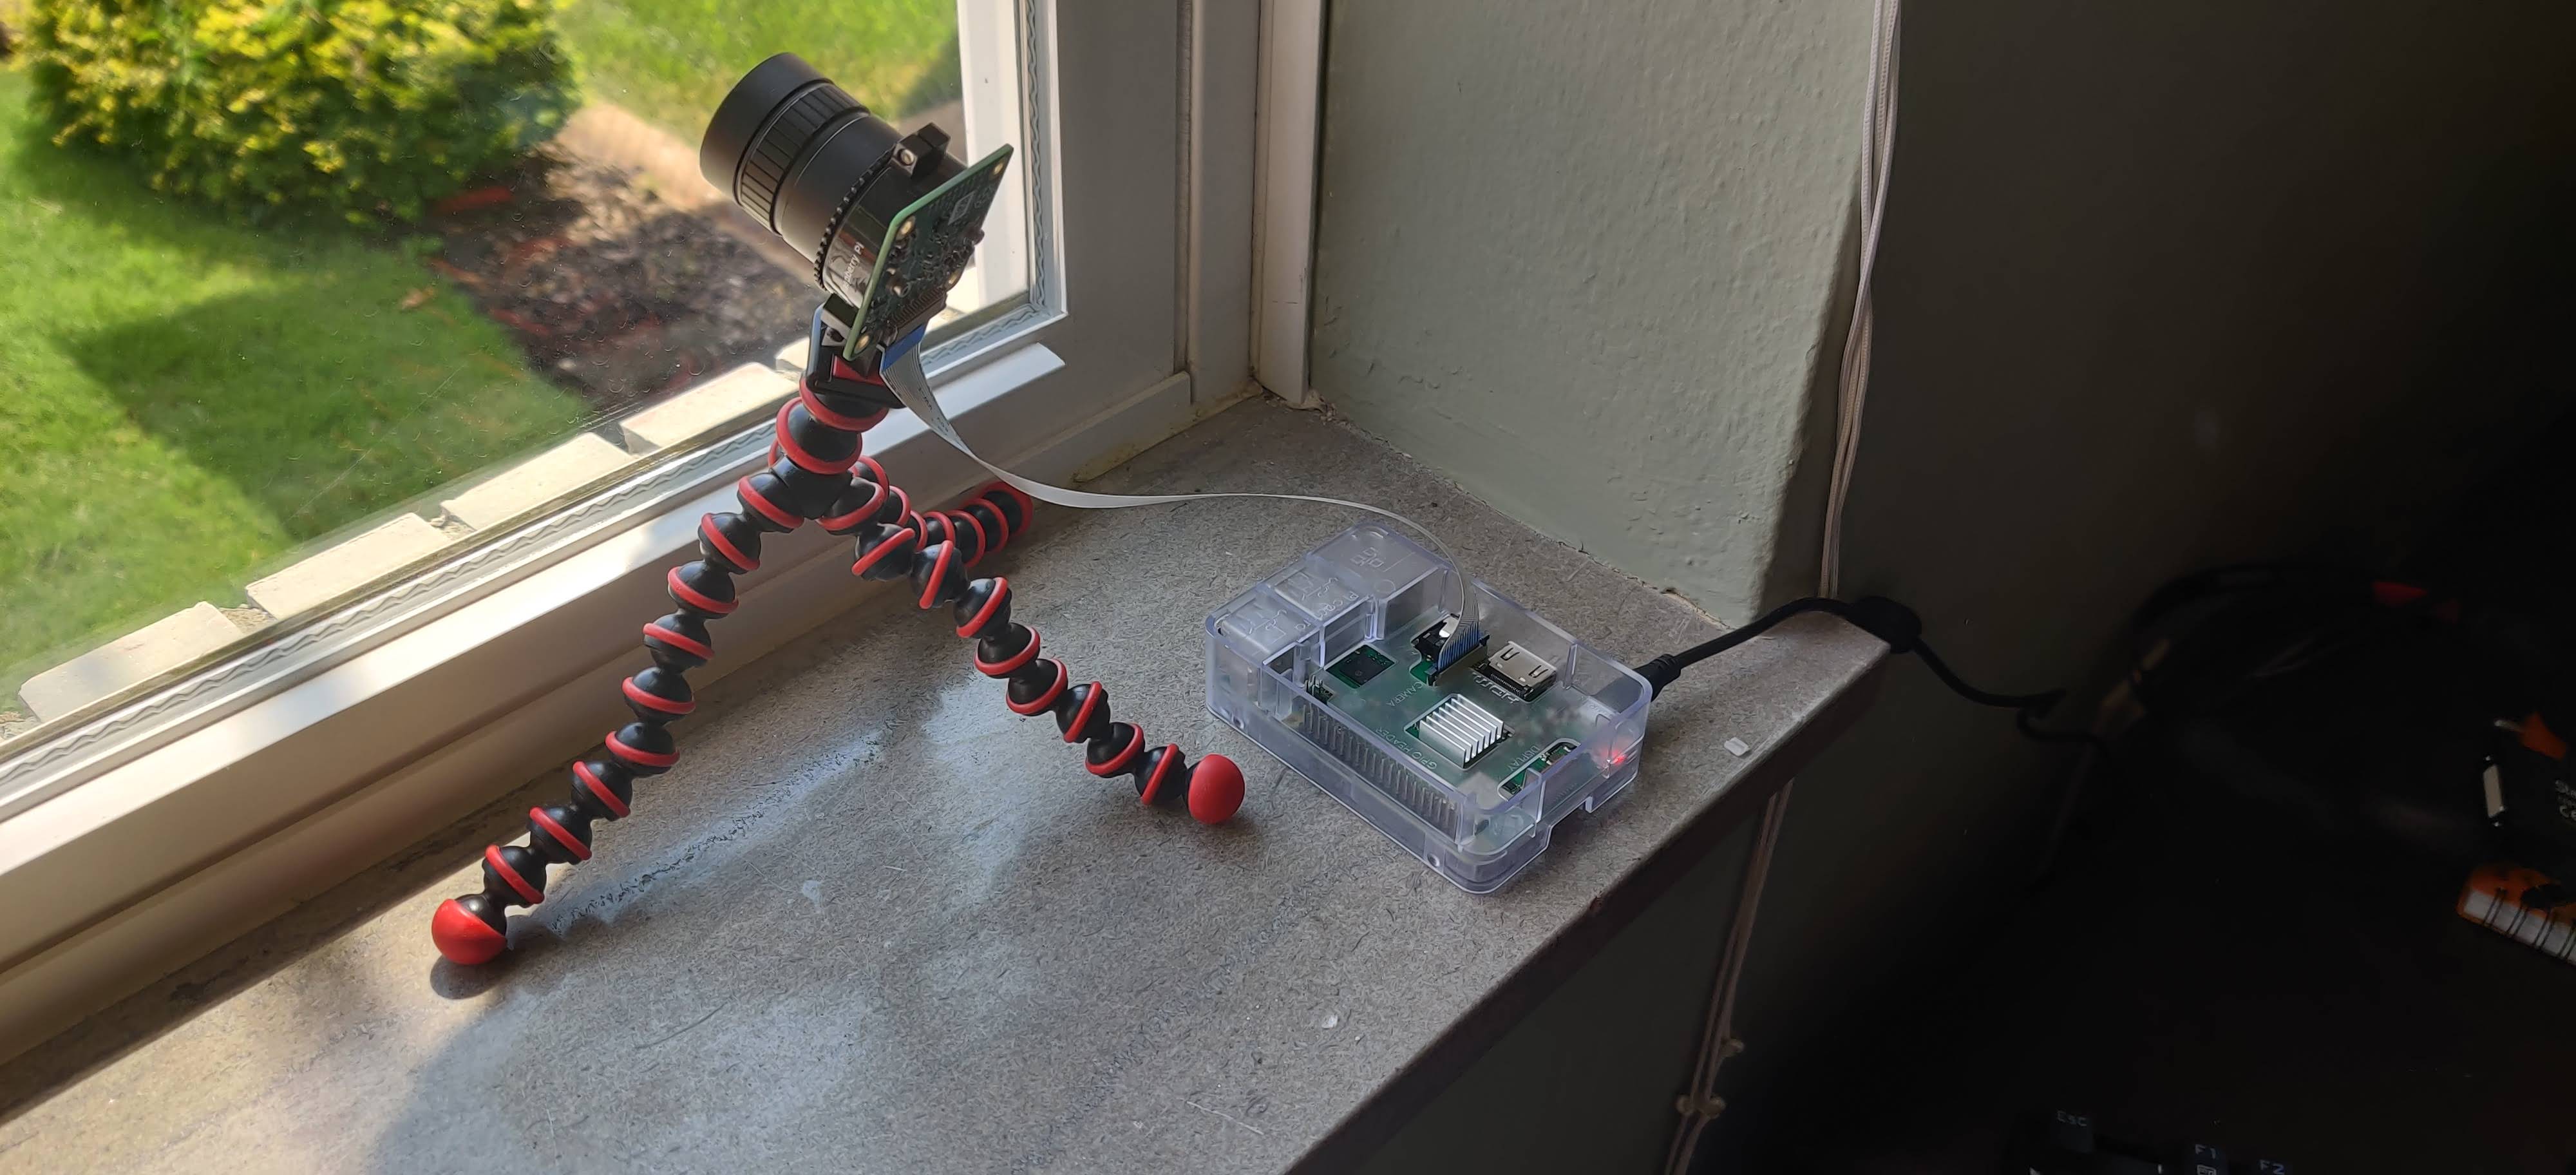
How did we get here? First, I impulse-bought the new Raspberry Pi HQ camera sensor without much of a plan.
Here's what that looks like when set up:
The inspiring and worthwhile Official Raspberry Pi Camera Guide provides a simple one-liner to use the raspistill package to capture a timelapse. Raspistill is included in the basic Raspian OS install, which is nice.
raspistill -w 1920 -h 1200 -t 7200000 -tl 6000 -o /var/www/html/frame%04d.jpg
This command will create a 1920x1200 pixel image every 6,000 milliseconds for 7,200,000 milliseconds and save them in the filepath /var/www/html/. They will be named frame0001, frame0002, frame0003, and so on.
You are also provided a command to compile the jpgs into a webm video.
sudo avconv -i /var/www/html/frame%04d.jpg -crf 4 -b:v 10M /var/www/html/video.webm
This one renders the video at a 25fps frame rate, a high bitrate, and a low Constant Rate Factor to produce a good-quality video. I'll admit that tinkering with video settings is something I have low patience for.
Rendering is highly resource intensive and the Raspberry Pi takes about 4 hours to render a 30-second video. Anyway...
Success! I have a video that I can share with Stephanie and others. But its a little slow and manual. Let's see what we can do to improve the process.
Speed
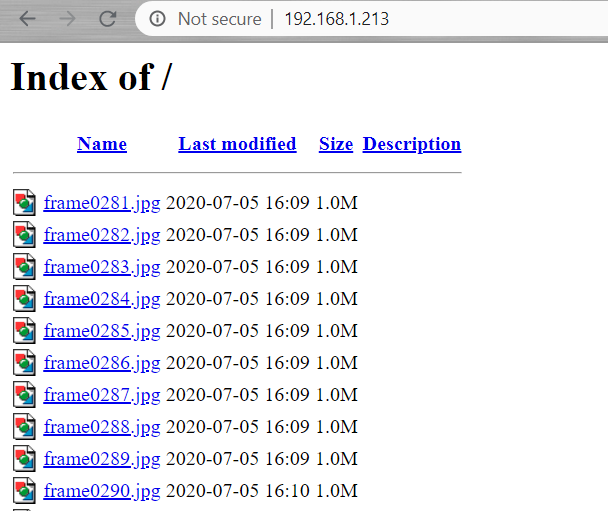
The Pi guide suggests moving the images to another, more powerful computer before rendering the video. To do this, I set up an Apache Tomcat HTTP web server that my laptop can reach over the home wifi network. The frames of timelapse are saved to the folder the web server displays to the web.
Tomcat does not by default display the directory listing, so the listing parameter has to be changed to true:
<init-param>
    <param-name>listings</param-name>
    <param-value>true</param-value>
</init-param>
Here is what the web server looks like from a web browser:
A simple wget or curl will pull the images down from the server to laptop.
Last, I used ffmpeg in place of avconv to render the video. I run Ubuntu on the Windows Subsystem for Linux (or WSL) on my Windows 10 OS. This allows me to sometimes avoid using Virtualbox.
Here is what WSL looks like:
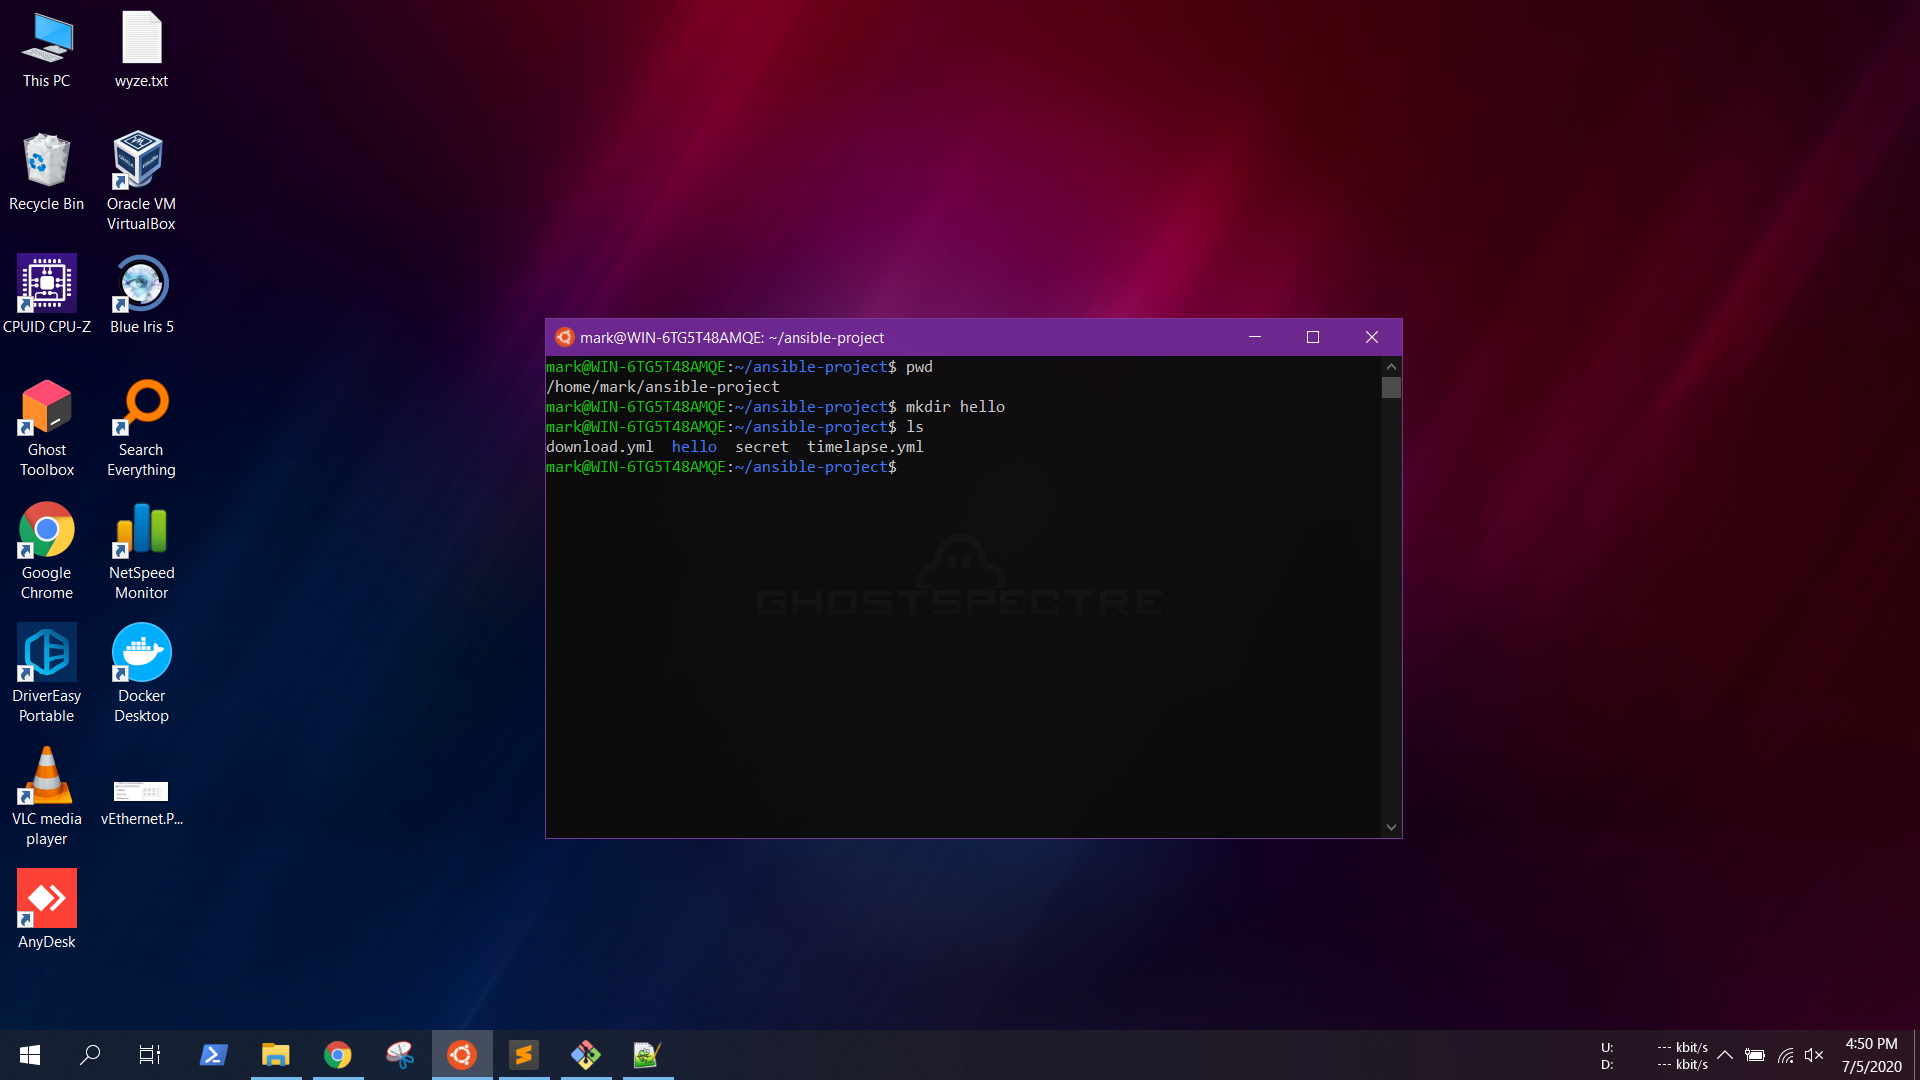
Its a lot smoother way to use Linux on Windows.
Anyway, avconv wasn't available on Ubuntu for some reason so I did some digging and it looks like ffmpeg does the same thing and has the same syntax. Over the course of the research I also discovered that there was a developer fight over at ffmpeg leading to multiple versions: The real ffmpeg vs the fake one
In the current form, it takes a couple steps to get a video produced.
- Kick off the
raspistill - Start the
wgetto download the stills - Begin the
ffmpegto render the webm - Access the webm to enjoy the video.
That's a lot of pain for a pleasant cloud video! Let's automate.
Automation
In my work as a consultant I have begin using Ansible, an open source software, for automating IT tasks. We use Ansible to deploy, upgrade, and backup Alteryx, Tableau, and MongoDB. Maybe there are other, simpler ways to do this automation but I know Ansible pretty well at this point so that's what I went with.
Ansible is a simple apt-get ansible away on Ubuntu and then I put a few lines in ansible.cfg and into the default hosts file.
Here is the playbook timelapse.yml. One thing I especially enjoy about Ansible is how self-documenting it is. By having the user give each play a name, it forces us into better documentation habits.
---
- hosts: pi
  name: Collect timelapse on the Pi
  become: yes
  gather_facts: no
  tasks:

  - name: Delete existing files...
    shell: rm -rf /var/www/html/*

  # The bracketed duration and interval are jinja2 variables
  - name: Begin timelapse capture...
    shell: raspistill -w 1920 -h 1200 -t {{ duration }} -tl {{ interval }} -o /var/www/html/frame%04d.jpg
    async: 7300
    poll: 5

  - name: TAR the files...
    archive:
      path: /var/www/html/
      dest: /var/www/html/images.tgz

- hosts: localhost
  name: Process video and tweet from the laptop
  connection: local
  gather_facts: yes
  become: yes
  tasks:
    - name: Download images archive from the Pi...
      get_url:
        url: http://192.168.1.213/images.tgz
        dest: /home/mark/timelapse/files/images.tgz

    - name: Unarchive tgz...
      unarchive:
        src: /home/mark/timelapse/files/images.tgz
        dest: /home/mark/timelapse/files/

    - name: Compile the files into an mp4...
      shell: ffmpeg -i /home/mark/timelapse/files/frame%04d.jpg -crf 18 -c:v libx264 /home/mark/timelapse/videos/output.mp4

    - name: Run tweetvideo.py
      shell: python3 /home/mark/timelapse/tweetvideo.py
      register: python_output

    - name: Rename output to output and timestamp...
      shell: mv /home/mark/timelapse/videos/output.mp4 /home/mark/timelapse/videos/output-{{ ansible_date_time.iso8601_basic_short }}.mp4

    - name: Remove images and TAR...
      shell: rm -rf /home/mark/timelapse/files/*
If you look closely... I output an mp4 here rather than the webm. That is because Twitter will only accept an mp4. The playbook kicks off a Python script that uploads the video to Twitter using the Twitter API.
One command
Now, with one Ansible command I'm able to orchestrate the work of the Pi and the laptop and leverage the Twitter API to post my tweet on @Stltimelapse. Stephanie and I both follow this account from our normal Twitter accounts, so the timelapse will just pop up in our feed. A pleasant surprise!
ansible-playbook timelapse.yml -k --extra-vars '{"duration":"7200000","interval":"8000"}'
This project demonstrates the kind of automation I love building - taking a manual, multi-step process and turning it into a single command that orchestrates multiple systems. The same principles apply whether you're automating sky timelapses or enterprise data pipelines.